Unlock the secrets to professional-looking Roblox clothing with our ultimate guide on shading shirts. For many US gamers, balancing a demanding job, family life, and personal responsibilities means gaming time is precious. This article dives into practical, time-efficient techniques for shading Roblox shirts, empowering you to create stunning custom avatars without a steep learning curve. We understand you value skill-building and maximizing your fun, so we cut through the hype to deliver actionable advice. Discover the essential tools, master beginner-friendly methods, and avoid common pitfalls to transform your Roblox wardrobe. Whether you are looking to express unique styles or even explore the creative marketplace, understanding shading is key. Stay current with trends and optimize your avatar's appearance, all while enjoying the relaxation and social aspects Roblox offers. This guide ensures you get value for your time and effort, making your in-game presence truly stand out among the vast Roblox community.
What is Shading a Shirt in Roblox and Why Does it Matter?
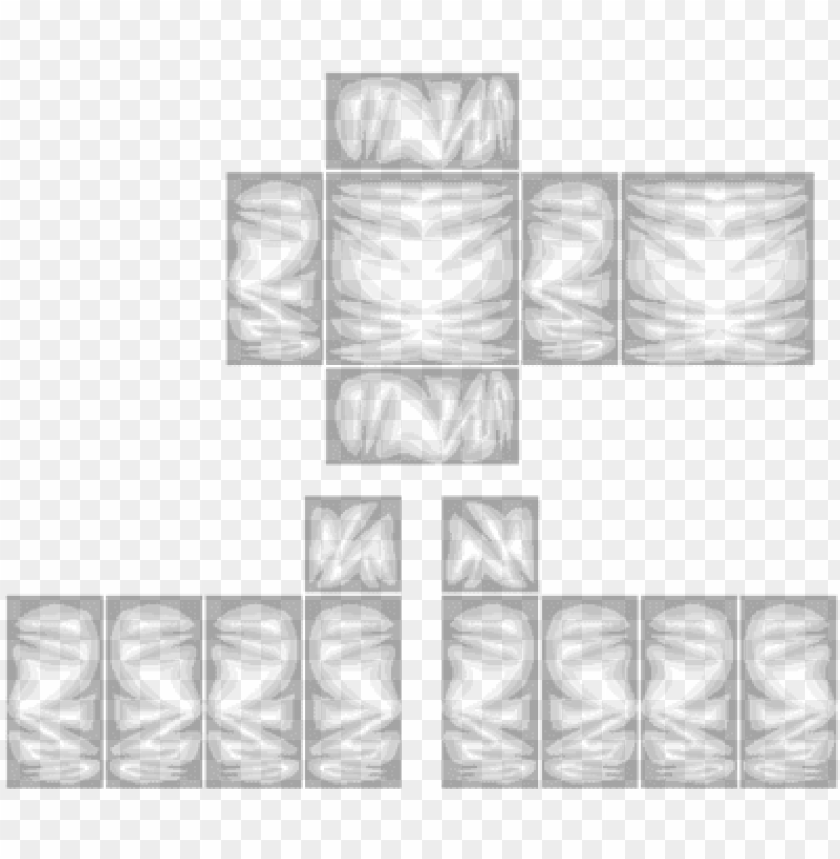
Shading a shirt in Roblox is the process of adding artificial light and shadow effects to a 2D clothing texture, making it appear three-dimensional and realistic when worn by an avatar. This technique is crucial because it transforms a flat design into clothing with depth, folds, and contours, significantly enhancing your avatar's visual appeal and making it stand out in the game. It allows busy gamers to achieve professional-looking custom clothing without extensive design experience.
What Are the Best Free Tools for Shading Roblox Shirts?
For gamers looking to shade Roblox shirts without spending money, excellent free tools are readily available. Photopea, a web-based editor similar to Photoshop, is highly recommended for its powerful features and ease of access. GIMP (GNU Image Manipulation Program) is another robust, open-source desktop option, while Paint.NET offers a simpler, user-friendly experience for Windows users. All these tools support layering and blending, essential for effective shading.
How Do I Start Basic Shading on a Roblox Shirt Template?
To begin basic shading, first download the official Roblox Shirt Template. Fill it with your desired base color. Then, using an image editor, create new layers for shadows and highlights. Apply subtle, soft dark tones to areas that would naturally be in shadow (e.g., under arms, side seams) and soft lighter tones to areas where light would hit (e.g., shoulders, chest). Blend these transitions smoothly using a soft brush or blur tool to create a natural, dimensional look.
What Common Shading Mistakes Should Roblox Designers Avoid?
Roblox designers should avoid several common shading mistakes for better results. These include over-shading (making shadows too dark or numerous), using inconsistent light sources, creating harsh, unblended lines, and forgetting to work on separate layers. It's also vital to remember that the shirt will wrap around a 3D avatar, so shading should reflect its form and not just be random marks on a flat image. Always use the official template correctly to prevent misaligned designs.
Can Advanced Shading Techniques Really Make My Roblox Shirts Look Professional?
Yes, advanced shading techniques can absolutely elevate your Roblox shirts to a professional level. Incorporating methods like texture overlays, detailed wrinkle and fold rendering, gradient mapping for richer color depth, and subtle ambient occlusion effects creates highly realistic and visually striking designs. These techniques, when combined with careful blending and a consistent light source, allow for intricate details that truly make custom clothing stand out in the Roblox marketplace and on avatars.
How Do I Successfully Upload and Test My Shaded Roblox Shirt In-Game?
To upload and test your shaded Roblox shirt, save your design as a PNG file to preserve transparency. Navigate to the 'Create' section on Roblox, select 'Shirts', and upload your PNG. After paying a small Robux fee (currently 10 Robux), configure your shirt with a name and optional selling price. Finally, equip the shirt on your avatar in the avatar editor to see how it looks in 3D. Inspect it from various angles and in different lighting to identify any areas for refinement and re-upload if needed.
Is it Possible to Earn Robux by Selling My Shaded Roblox Shirt Designs?
Yes, it is entirely possible and common for creative gamers to earn Robux by selling their shaded Roblox shirt designs. Roblox has a robust creator economy where high-quality, unique custom clothing items are in demand. If your shaded shirts are well-designed, follow current trends, and appeal to the player base, you can set a price and earn a percentage of sales. This allows many designers to fund their own gaming activities or even earn a significant amount through their artistic contributions to the platform.
Are you a dedicated gamer who, like 87% of US gamers, regularly dives into virtual worlds, often balancing your passion with a demanding job and family life? You crave unique self-expression, but finding time to master complex design tools for your Roblox avatar can feel like another chore. You want your avatar to stand out, to reflect your personality with professional flair, but without spending hours learning graphic design. That's where mastering shading shirt Roblox techniques comes in. This guide is crafted for you – the busy gamer who values skill-building, social interaction, and getting the most value from your gaming time. We'll demystify the art of shading Roblox shirts, providing clear, actionable steps to elevate your custom clothing designs. Forget the hype and complicated jargon; we're here to help you create awesome, eye-catching outfits efficiently, so you can spend less time designing and more time enjoying the game with friends.
We know that staying current with trends and optimizing your in-game experience is important. This month, customizing avatars remains a top trend, with mobile gaming still dominating and social gaming experiencing a boom. A well-shaded shirt can dramatically improve your avatar's look, giving it depth and a more realistic, polished appearance that grabs attention in the bustling Roblox universe. Many gamers, including the average 36-year-old playing 10+ hours a week, want to achieve this level of customization. Let's dive into how you can achieve fantastic results for your Roblox shirts, even if you only have limited time.
What Exactly is Shading a Shirt in Roblox?
Shading a shirt in Roblox refers to adding light and shadow effects to your custom clothing textures. Think of it like drawing on a 2D canvas, but with the goal of making it look 3D when wrapped around your Roblox avatar. This process involves strategically placing darker areas (shadows) where light would naturally be blocked and lighter areas (highlights) where light would hit directly. The ultimate goal is to give your shirt design depth, realism, and a more professional, less flat appearance, making your Roblox avatar truly pop in any game world.
Why is Shading Important for Roblox Shirt Designs?
Shading is crucial for several reasons, especially if you want your Roblox designs to look polished and appealing. Firstly, it adds visual depth and dimension to what is essentially a flat 2D texture. Without shading, shirts can look painted directly onto your avatar, lacking realism. Secondly, it helps define the contours and folds of the fabric, making the shirt appear more like actual clothing and less like a static image. Thirdly, well-executed shading enhances the overall aesthetic quality of your avatar, helping it stand out in a crowd. For gamers who enjoy personal expression and social play, a custom avatar with a high-quality, shaded shirt sends a clear message about your style and attention to detail, making your presence more impactful and memorable within the diverse Roblox community.
What Tools Do I Need to Start Shading Roblox Shirts?
To begin shading Roblox shirts, you won't need an expensive professional art suite. Most gamers find success with accessible and often free software. The primary tool is a reliable image editing program. Here are some popular options:
Photopea: A free, web-based editor that's very similar to Photoshop, making it excellent for advanced features without the cost.
GIMP (GNU Image Manipulation Program): A powerful, free, open-source desktop alternative to Photoshop, offering extensive features for detailed work.
Paint.NET: A free, user-friendly image and photo editing software for Windows, known for its simplicity and effectiveness.
Adobe Photoshop (Paid): The industry standard, offering the most robust features for professional results, though it comes with a subscription.
Beyond the software, you'll need the official Roblox Shirt Template. This template provides the exact layout and dimensions needed to ensure your design wraps correctly around the avatar. You can easily download it from the Roblox Developer Hub.
How Do I Get Started With Basic Shading Techniques?
Starting with basic shading for your Roblox shirt is simpler than you might think. The key is understanding light and shadow fundamentals.
Download the Roblox Shirt Template: This is your canvas. It shows where the front, back, sleeves, and sides of the shirt will be.
Add Your Base Color: Fill the template with the main color of your shirt design.
Identify Light Source: Imagine where the light source is coming from (e.g., top-left). This dictates where highlights and shadows will fall.
Apply Basic Shadows: Create a new layer for shadows. Using a soft airbrush or brush tool, paint slightly darker shades on areas that would be in shadow, such as under the armpits, along the side seams, and in any folds. Keep it subtle at first.
Add Highlights: On another new layer, use a slightly lighter shade or white with low opacity. Apply this to areas where light would directly hit, like the shoulders, chest, and top of the sleeves. Again, a soft brush works best.
Blend and Refine: Use a blur tool or lower the opacity of your shadow/highlight layers to make the transitions smooth and natural. Avoid harsh lines.
Practice is vital. Start with simple designs and gradually add more complexity as you get comfortable. Many gamers find quick tutorials online to be very helpful for visualizing these steps.
What are Common Mistakes to Avoid When Shading Roblox Shirts?
Even experienced designers can fall into common traps when shading. Avoiding these pitfalls will significantly improve your results:
Over-Shading: Adding too many shadows or making them too dark can make your shirt look dirty or unrealistic. Less is often more; subtle shading is usually more effective.
Ignoring the Avatar's Form: Remember the shirt will be on a 3D avatar. Shading should follow the body's natural curves and folds, not just be random blotches on a flat canvas.
Inconsistent Light Source: Decide on a single light source and stick with it. Having shadows and highlights that suggest light from multiple directions creates a confusing and unnatural look.
Harsh Lines: Hard, sharp lines for shadows and highlights rarely look good. Use soft brushes and blending tools to create smooth, gradual transitions, mimicking how light falls on fabric.
Not Using Layers: Always work on separate layers for your base color, shadows, and highlights. This allows for non-destructive editing, making it easy to adjust or remove elements without ruining your entire design.
Forgetting the Template: Misaligning parts of your design or shading outside the designated areas on the Roblox template will lead to distorted or misplaced textures on the avatar.
How Can I Add More Advanced Shading Effects to My Designs?
Once you've mastered the basics of shading, you can explore more advanced techniques to truly make your Roblox shirts stand out:
Texture Overlays: Add subtle fabric textures (like denim, cotton, or leather) as an overlay layer. Adjust its blend mode (e.g., Overlay, Soft Light) and opacity to add realistic surface detail that reacts to your shading.
Wrinkle and Fold Details: Instead of just general shadows, study how clothes wrinkle and fold. Use a smaller, soft brush to paint in specific shadow and highlight lines that mimic realistic creases, especially around elbows, shoulders, and the torso.
Gradient Mapping: Experiment with gradient maps to create more complex color shifts for your shadows and highlights, moving beyond simple darker/lighter versions of your base color. This can add richer, more vibrant depth.
Ambient Occlusion: While typically a 3D rendering term, you can simulate ambient occlusion by adding very subtle, soft, dark shadows in crevices and tight corners where light would struggle to reach. This adds a sense of grounded realism.
Reflective Highlights: For materials like silk or satin, add sharper, more intense highlights to suggest a reflective surface. Use a smaller, harder brush with a very light color and blend it out slightly.
Wear and Tear: Incorporate distressed effects like rips, tears, or faded areas. Shading these elements consistently with your overall light source will make them look integrated rather than just painted on.
Remember that even advanced techniques are about careful layering and blending. Test your designs frequently in Roblox Studio to see how they look on an actual avatar.
How Do I Upload and Test My Shaded Roblox Shirt?
Uploading and testing your shaded Roblox shirt is a straightforward process, but attention to detail is key to seeing your hard work come to life in-game. Here's a step-by-step guide:
Save Your Design: Once your shading is complete, save your image file in PNG format. This preserves transparency, which is crucial for the template's cutouts.
Navigate to the Create Page: Log into Roblox, go to the 'Create' section, and select 'Shirts' under 'My Creations' or 'Avatar Items'.
Upload Your File: Click 'Choose File', select your saved PNG, and give your shirt a descriptive name. Roblox requires a small Robux fee to upload (currently 10 Robux), which helps maintain quality control and prevents spam.
Configure and Sell (Optional): After uploading, you can configure your shirt. This allows you to set a price if you want to sell it, add a description, and choose genres. Many gamers earn a little side income this way, which can fund other in-game purchases or even hardware upgrades on a budget.
Test in-Game: The best way to see how your shading looks is to put the shirt on your avatar. Go to your avatar editor, find your new shirt, and equip it. Spin your avatar around, zoom in, and check it from different angles. You might notice areas that need more blending or slight adjustments. This iteration process is normal and part of getting a perfect design.
Iterate and Refine: If you spot issues, go back to your image editor, make adjustments, and re-upload. It's a small investment in Robux but ensures your final product is exactly how you envisioned. Remember, precision pays off when creating top-tier custom content.
Can I Earn Robux by Creating and Selling Shaded Shirts?
Absolutely! Many creative US gamers generate significant Robux by designing and selling high-quality custom clothing, including expertly shaded shirts. Roblox's creator economy is thriving, offering a fantastic opportunity to monetize your artistic skills. If your designs are unique, well-made, and appeal to current trends, they can become very popular. Keep an eye on what's trending, offer a variety of styles, and engage with the community to promote your creations. Selling items not only funds your own in-game adventures but also showcases your talent, potentially leading to commissions or collaborations. It's a great way to turn a gaming hobby into a productive, value-generating activity.
As we've seen, mastering shading shirt Roblox designs doesn't require a graphic design degree or endless hours. It's about understanding a few core principles, utilizing accessible tools, and practicing patience. For the busy gamer, these techniques offer a rewarding way to enhance your avatar, express your unique style, and even connect with the vibrant Roblox community. The satisfaction of seeing your custom, professionally shaded shirt on your avatar, or even on others, is immense. It's about making your gaming experience more personal and visually engaging, aligning perfectly with the desire for fun and skill-building that drives so many of us.
What's your biggest challenge when it comes to customizing your Roblox avatar? Comment below! We'd love to hear about your experiences and help you tackle your next design project.
FAQ Section
Q: Is shading necessary for all Roblox shirts?
A: While not strictly mandatory, shading dramatically improves the visual quality and realism of Roblox shirts, making your avatar look much more polished and professional compared to unshaded, flat designs.
Q: Can I shade Roblox shirts on my phone or tablet?
A: Yes, many mobile image editing apps like Ibis Paint X or Autodesk Sketchbook offer layering and blending features suitable for basic Roblox shirt shading, allowing for creation on the go.
Q: What is the ideal resolution for a Roblox shirt texture?
A: The recommended resolution for Roblox shirt and pant templates is 585 pixels wide by 559 pixels tall. Using this size ensures optimal clarity and fit on the avatar.
Q: How can I find shading templates or guides within Roblox itself?
A: Roblox's Developer Hub is the official source for templates and guides. You can also find numerous community-made tutorials and resources on YouTube and fan forums dedicated to Roblox clothing design.
Q: Does shading make my Roblox shirt load slower in-game?
A: No, shading itself does not impact loading times. The overall file size of your PNG texture is what matters, but modern image formats and Roblox's optimization mean this is rarely an issue for clothing items.
Q: What if my shaded shirt looks weird on a different avatar body type?
A: Roblox's template is designed to fit standard avatar bodies. Subtle shading variations might occur on very extreme body types, but well-placed general shading should look good across most common avatar forms.